Showing posts with label Battle report. Show all posts

Thursday, 3 April 2025

Infinity Battle Report: Shasvastii vs O-12: Frontline

 
Continuing my attempts to practice with my Shasvastii, I had another practice game at the club. My opponent brought his O-12, and the mission was Frontline. I decided to try a list that leaned heavily into Infiltrating and Forward Deployed models


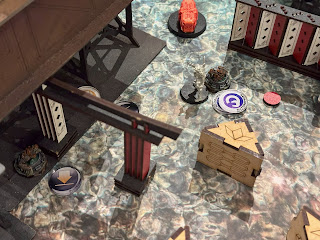
I had a good number of camo tokens scattered across the midfield - I had a couple of Shrouded, a Malignos Killer Hacker, and a Caliban Spitfire. I had a classified mission involving a visor and my opponent's HVT, so I held back the Caliban Spitfire so it could make the run early and didn't have too far to go.


This took a few orders, but a Taigha cleared a mine, the Caliban cleared the reaction remote, then camoed up to get past another model, got the classified then re-camoed to provide him a little protection in my opponent's turn.


With my handful of remaining orders, I moved a Taigha up to annoy an errant camo token.


Sadly, the camo state didn't help the Caliban much. It got discovered and taken out pretty swiftly.


My right flank got thoroughly attacked and the pieces there were put unconscious.


Focusing my efforts on classifieds, my Speculo needed to pass a WIP roll in base to base contact with an opposing remote. It succeeded at this, then chopped the remote in half.


The Speculo then went on to try and take out an O-12 hacker, but didn't manage to get a killing blow.


The Malignos also went up to take out some model or other, but ran out of orders to recamo. This was a definite mistake as it got swiftly taken out.


A Varangian ran over to try and rescue the Hacker, but also managed to fail to land a kill - but this stalemate locked in out of the scoring zones, so we were both stuck!


At this point the Zeta came out and just started deleting stuff. I tried to use my Shrouded to Posses it as my opponent was out of Command Tokens, but I couldn't land a hit and ran out of orders.


With a Crusher having joined the attack on my right flank and having scored a classified on the building, I took my Obsidon Medchanoid around to try and fire a Gizmokit at an enemy troop. Sadly, he lost the face to face and exploded.


I moved a few troops into zones, but I was heavily down points, and my opponent was easily able to move troops between zones to get a solid win.

On reflection, I needed more punch in the list. I didn't have enough firepower to deal with some of the threats I was up against. I like a lot of the tools I used, but putting all of the finesse tools into a list can really fall over in the face of even quite moderate violence. Putting in more of a mix of troops may be a better solution.

Friday, 28 March 2025

Infinity Battle Report: Mindwipe, Shasvastii vs Ramah Task Force

 
This week's Shasvastii practice game pulled up "Mindwipe" on the random generator. This isn't a popular mission, but I was up for giving it a go. My opponent was bringing Ramah Task Force.


I'd won the first turn, so wanted to set up pressing the button on a console securely. I had my fancy hacker (a Shrouded Killer Hacker) hiding near the button, with a Speculo Killer tucked into a nook where she could see the console as well.


This plan worked very clearly. The Speculo threw smoke over the console then re-impersonated, then the Killer Hacker came up, pushed the button within the smoke, then re-camoed and headed off to a new hiding spot.


The rogue AI was hiding in the most defended console, in the centre of my opponent's deployment. I used my remaining orders to walk up the Speculo Minelayer to drop another mine in the most awkward spot possible, then again re-camoed.


My opponent sensibly and efficiently cleared the mine, discovered and killed the Shrouded Minelayer, then went to focus on the mission. He brought up a Hunzakut who cleared a Taigha creature before making his way to the console, crawling the last part of the way to stay out of sight of the mine laid on the other side of it, while smoke kept my Q-Drone from impeding the button pushing.


Leila Sharif decided that E/M mining the entire console building was a reasonable and proportionate thing to do. It was a good way of stopping any sneaky rush for the server.


I decided to send my Paramedic Seed Soldier to do my classified with my opponent's HVT. Pesky repeaters got him targeted, then I just couldn't pass a WIP check! At the time, I thought I'd got my classified, but as I was heading home, I realised I'd counted an order in the wrong pool, so texted my opponent to Correct the Record.


I sent my Uberhacker to try and get the console, but hadn't noticed a model who could discover them, which proceeded to leave him sitting in the Repeater network. Checking the Mindwipe special hacking programme, it's burst 1 and D/A, so I was certain it would be multiple orders to clear it - so I went after the hackers first, and the Shrouded got melted.


My opponent made some consolidating moves, then brought on a Hakim, who was able to take out the Q drone, but there weren't quite enough orders for him to get back anywhere safe, or reach the console. That said, it took me some orders to bring my Mentor around to clear the Hakim and for my Med Tech to repair the Q Drone.


I sent Sheskiin in to try and score some servers. Not able to fight through to the main server, I decided on taking out one of the others - I did so, but she got Flash Pulsed as she did, meaning I put my remaining orders into defending my own servers.


The Ramah fireteam was able to make their way up and destroy my centre server, which was also a decoy. My opponent had gotten muddled after picking the server to my left, but we looked back and determined that he wouldn't have had the orders to successfully hit the Rogue AI server.

With my classified actually unscored, this left us both scored with one console and one decoy server apiece. This felt right for such a close, cagey game. I don't hate this mission, but can see how you need to design your list a lot for it, and it favours the player going first heavily. In particular, locking out a console for your opponent is incredibly tough on whoever is going second.

Still, I feel like I'm getting a good cross section of Shasvastii units, and am starting to get a good idea of what I get on with running in this edition.

Friday, 21 March 2025

Infinity Battle Report: Firefight, Shasvastii vs O-12


I've been playing quite a few games of Infinity to "get my eye in", as it were, with the new edition. With the Tinbot tournament in the past I'm focused in on Shasvastii now. I had a game arranged with one of the club, running O-12, and our pick of mission was Firefight.

I decided to try running the Sphinx this game. It did mean I was a bit lacking in other attack pieces due to a lack of points. I'm sure that wouldn't be a problem...


I snuck a Shrouded Hacker up the field to tuck into a nook in a building and complete the Mapping Classified.


I then sent the Sphinx up to clear some ARO pieces


However, I over-reached a little bit and got caught in the open in a crossfire as the Sphinx moved up, taking two damage. With my engineer in the same group, I didn't have the orders to bring it up to repair this turn, so I needed to get back into cover and survive until next turn.


Unfortunately, I managed to catch another damage as I tried to move out of sight, falling unconscious. In the hope of keeping it alive, I moved my Q drone over to defend it.


My opponent proceeded to drop their speedballs on my right flank to enable his attack there.


The Shrouded who'd completed the Mapping objective was hunted down by an angry Varangian.


As the O-12 forces advanced, my Taiga started dodging towards them. They picked the speedballs, but managed to glue Victor Messer in place. Inconvenient.


Still, the Taiga got into the attacking piece to hold up it's attack run.


To keep me from repairing my Sphinx, a Crusher arrived and took out my servant remote.


The Crusher then moved around and took out my T-drone guided missile remote as well. I was really starting to run out of attack vectors!


The other Varangian came up to help out the O-12 unit my Taiga was pinning down, and managed to take it out with the extra dice from their buddy.


The Crusher went to take out my R-drone, but got stunned.


That was about all my luck, as my Q drone also got mushed.


I ended up needing to use my Mentor Lieutenant to clear some turrets in my turn, but with all the casualties I'd taken, didn't manage to get much else done. Including "get my Lieutenant clear" - he went down to the Varangian who'd killed the Shrouded, meaning I spent my third turn in Loss of Lieutenant.


Victor was still glued, so was picked off...


I managed to use command tokens to get my Doctor Worm up the the table to Gizmokit the Spinx, and score me a classified. But I didn't really have the orders to do anything else. A Varangian came up and tried to punch out the Sphinx, but it turned out it could punch pretty hard, got lucky, and managed to take out the Varangian.

In the end, it wasn't enough - I'd scored a couple of classifieds but had lost more points, more specialists, and not scored Panoplies.

So, I certainly mis-used the Sphinx here and tried to fight multiple things at bad range without enough orders to get away again. I also probably had the wrong support package for it. I'm still not sure if the Sphinx has a good place in Shasvastii right now. I'll probably try a few other bits and pieces before coming back to it.

Thursday, 13 March 2025

First Ever Frostgrave Battle Report: The Keep

 
I recently got to try Frostgrave for the first time. My witch, Hannah of the Owls, led her warband to explore a magical keep to try and recover magical treasures and knowledge. As her warband approached the perimeter of the keep, they spotted a rival band, led by an experienced elementalist. Both sides drew weapons, preparing for battle.


There were five treasures, one in the centre of the keep on a raised area, the other four in the centre of magic circles spaced around the edge. The warband split up to gather the treasure before they engaged the opposing warband. As warband members on both sides started entering the circles to retrieve the treasure, there were fizzles of magic, but nothing happening . . . 


. . . until one of the warband thieves walked into a circle and in a flash of magic teleported across the keep to another circle. Unfortunately, the circle where the other warband's barbarian was standing.


Several of the warband jumped into the magic circle to try and rescue the thief, but to no effect. Our little gremlin thief decided to "waste not, want not" and grabbed the treasure from the circle.


Meanwhile, the magic circle on Hannah's warband's side was suddenly full of rival warband members, who quickly grabbed the treasure there and started planning their escape route.

The warband thug ran into a magic circle and was pulled over to the magic circle with the barbarian, and the two of them together managed to push the barbarian away, even though they weren't able to take her down.


As the rival elementalist saw my warband starting to head towards the central treasure, he summoned up a gigantic stone wall to block access to the treasure.


Still, it turns out that you can climb, so my woman-at-arms spent a couple of turns climbing over the wall, and engaged the rival man at arms while another warband member was fleeing with the treasure.


A portal flashed, and a giant worm arrived, drawn by the sounds of conflict.


Hannah's archer was overwhelmed by two of the rival band making off with one of the treasures.


The warband's crossbow-woman was chased by the worm, and chose to flee to get away from it.


A hostile construct then arrived, probably following the worm as a threat, but then identified multiple "thieves" in the keep, and moved to try and stop them.


My woman at arms was magically leapt to chase after the treasure, but was caught up by the rival warband and overwhelmed.


Hannah's apprentice ended up caught by the worm after a cunning plan to lure it across the teleport circles to move it elsewhere failed.


A desperate scuffle was breaking out over the last treasure, as both sides had, by now, escaped with two.


The back and forth continued a short while, but soon, Hannah's warband was overwhelmed, and the elementalist's band escaped with the last treasure.

In the aftermath, Hannah's warband took stock. Our woman at arms had been killed outright, and the party apothecary had been injured badly enough to miss the next expedition. No-one else suffered significant long lasting effects. Checking the recovered treasures, Hannah discovered a Staff of Power that would help with her casting, and a significant pile of gold, which was enough to hire a Templar to replace the deceased woman at arms with a little spare.

With my wizard having also gained two levels, I enjoyed my first game of Frostgrave. I'm still learning the rules, and now need to paint up a Templar before my next game.